-
Clipboard Manipulation using Keyboard Maestro
Keyboard Maestro has many triggers; these are responsible for executing macros. One such trigger is “The System Clipboard Changes“. I don’t use it often, despite how incredibly useful it is. It does exactly what it says: if a macro uses this trigger, Keyboard Maestro will execute the macro any time the clipboard content changes (when you “copy” something).
Here’s a quick example showing the usefulness.
There is a specific issue I have with Microsoft Outlook webmail within Google Chrome. Our email system leverages urldefense.com to alter all external links in the interface (see below). If I’m clicking a link, that’s fine, but if I want to copy a link’s URL it’s annoying to have to clean up the URL to remove the urldefense cruft.
12BEFORE: https://urldefense.com/v3/__https://someurl.com__;!!LQXXzXo!wt7t_lSnYAFTER: xxxxxxxxxxxxxxxxxxxxxxxxxxxx xxxxxxxxxxxxxxxxxxxxxxEverything I’ve marked with an “x” is added by urldefense.
The macro is simple. I leverage The System Clipboard Changes trigger to trigger the macro. The macro is inside of a macro group that is only activated for Google Chrome. I use an If Then Else action to determine if the URL is a target for manipulation. Finally, I use a Search and Replace action with some regular expressions to strip off the urldefense cruft.

-
Using Keyboard Maestro to Set a Window Size for Recording
This is a quick one, folks. This simple KM macro sets the front (active) window to a specific size. I use it to prepare a window for screen recording.
Image of Macro:
Text of Macro:
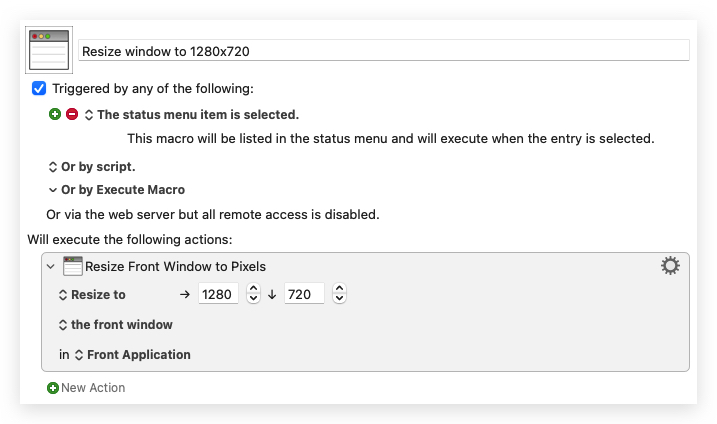
Resize window to 1280×720
Triggered by any of the following:
- The Status Menu is selected
Will execute the following actions:
- Resize Front Window to Pixels
- To: 1280 horizontally, 720 vertically.
- Notify on failure.
-
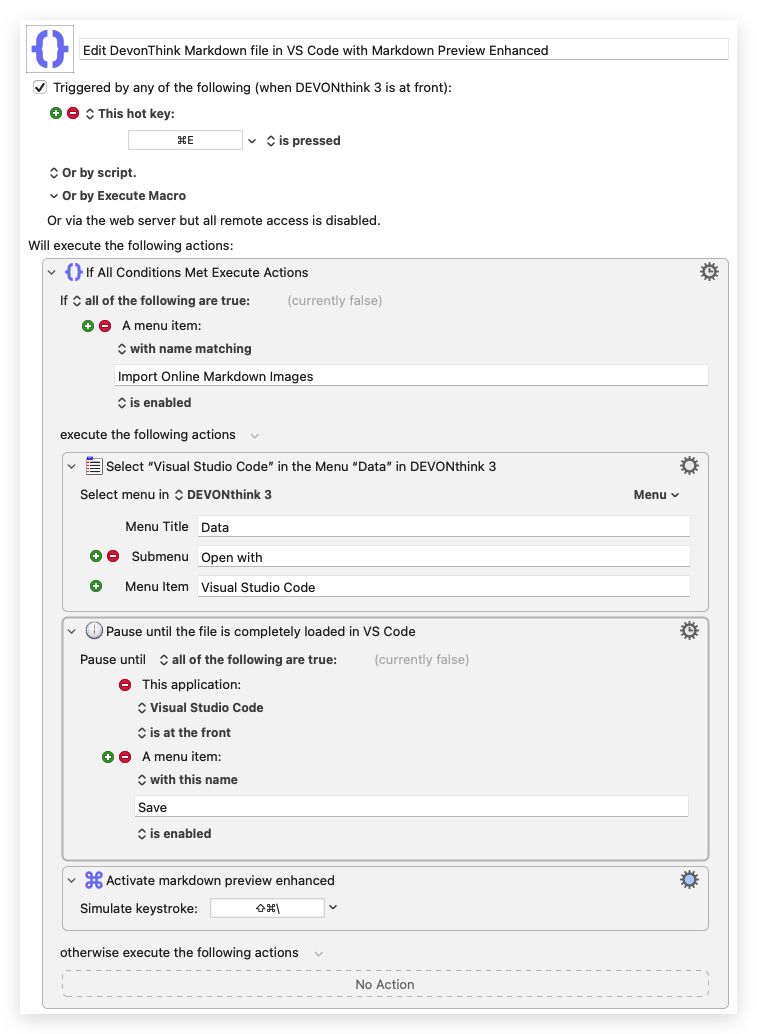
Editing a DEVONThink Markdown File in VS Code
This is a sister post to Editing Web Content in VS Code.
This simple macro opens the current file (if Markdown) in VS Code, with the Markdown Preview Enhanced pane open on the right automatically.
-
Editing Web Content in VS Code
Okay, so it’s not quite as amazing as the title suggests, but this solution is worth sharing.
I work a lot in Bookstack. It’s a fantastic documentation system built with Laravel. I edit all pages in markdown. There is a markdown pane on the left and a preview on the right. I love the UI (shown below) but unfortunately I cannot move around in the editor like I can in PHPStorm or VS Code, where I have Vim support.
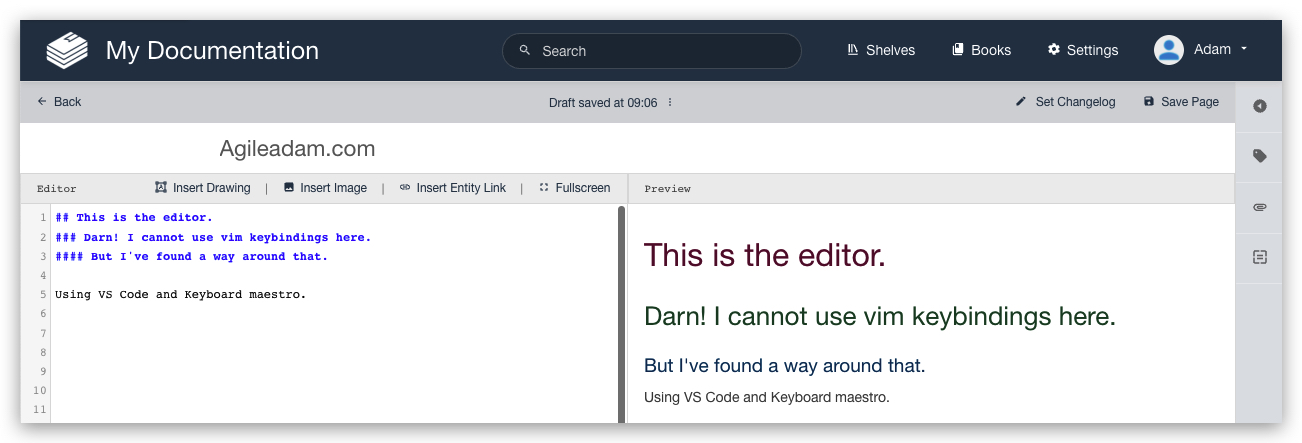
I have a Chrome extension called Wasavi, which is incredible for editing text areas in an inline virtual Vim window. Unfortunately, though, it doesn’t show realtime feedback in the preview pane until I save and close out of the virtual editor.
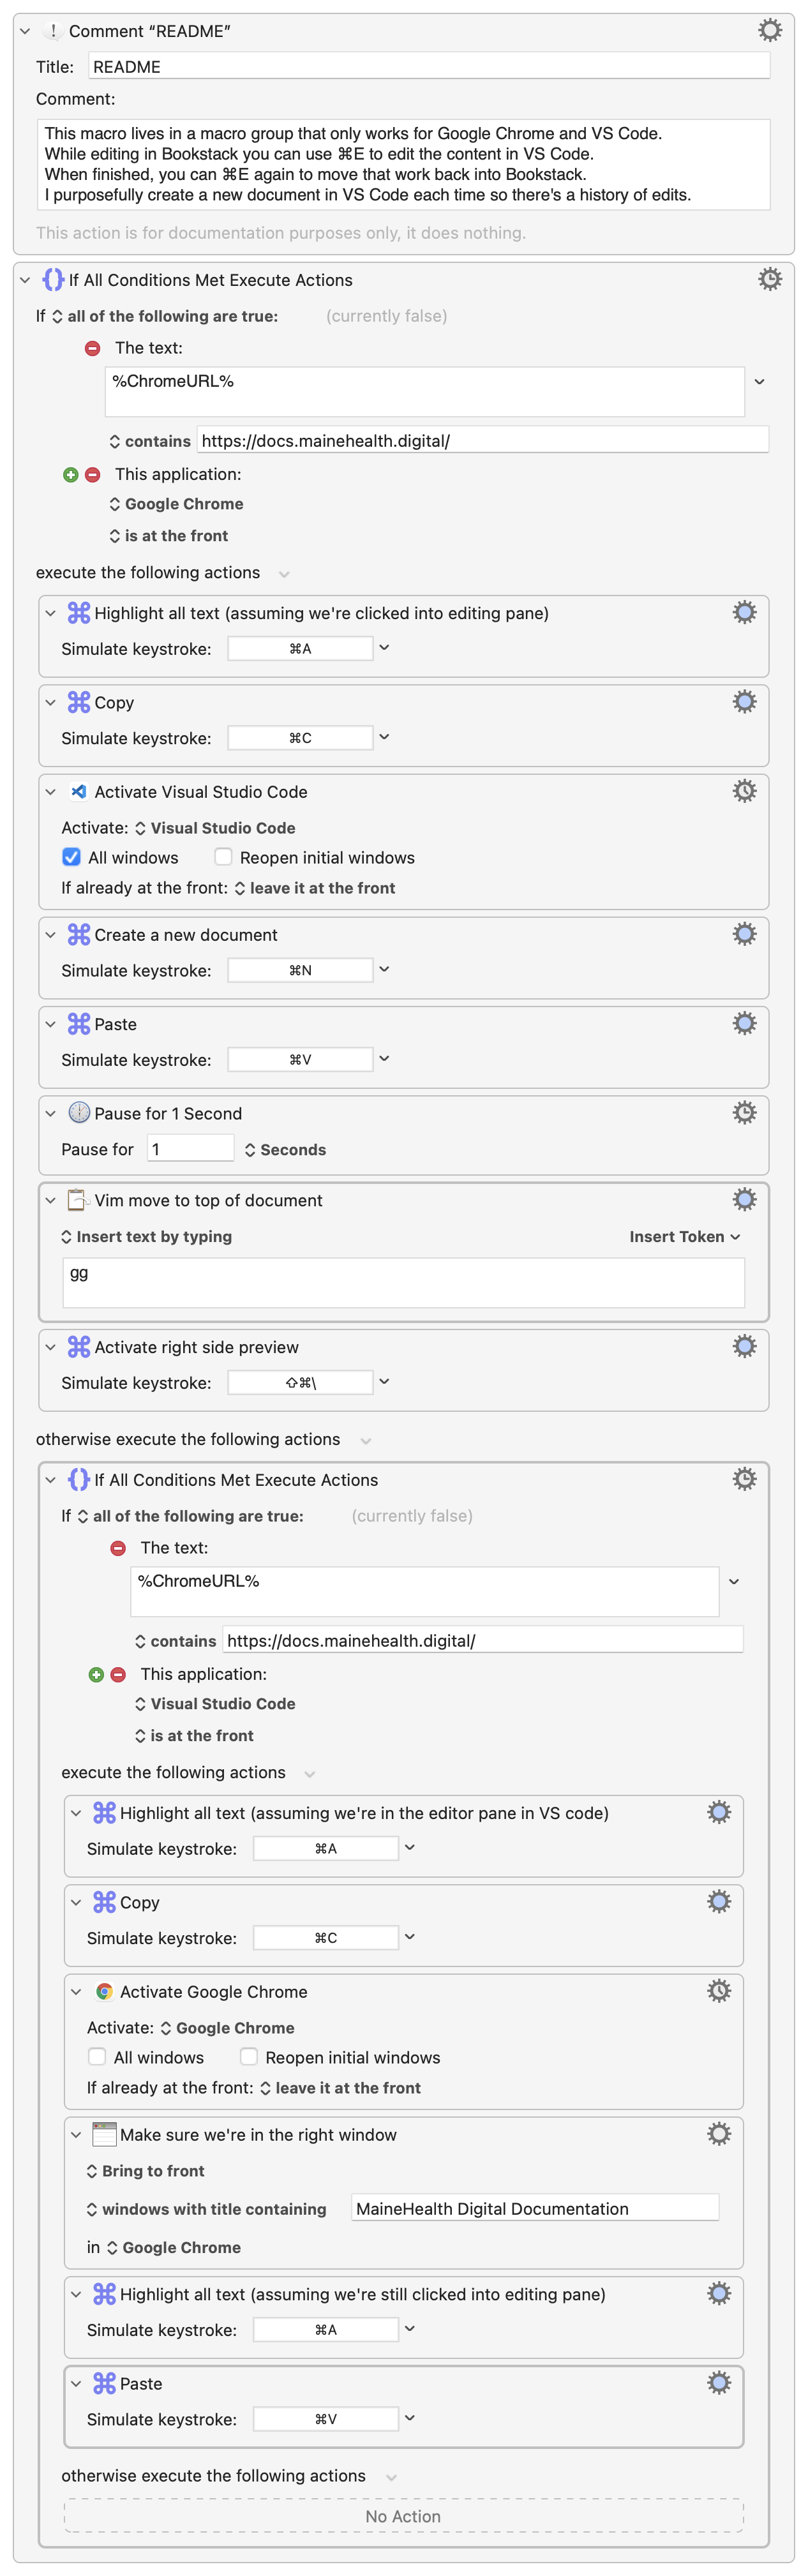
It occurred to me it’d be useful to just pop into VS Code quickly to edit the doc, then bring those edits back into the Bookstack editor in Chrome. At first I dismissed the idea as being “too much work.” After thinking about it for a moment, though, I realized I could MacGyver this relatively quickly with my favorite Mac application, Keyboard Maestro.
Here’s what I came up with. As with most things, I am sure I’ll tweak this over time to make it better, faster, less “error”-prone, etc. I have added a README comment and renamed most actions so it’s (hopefully) easy to understand the approach.
-
One-handed Gmail Inbox Culling with Keyboard Maestro
Keyboard Maestro proves, once again, why it’s at the top spot on my most recommended Mac applications list.
My normal procedure for culling (deleting unwanted) emails in Gmail is (with list on left and email preview on right):
- Open the first email (opens in right pane)
- If deleting, press “#” (⇧3)
- Else, if skipping, press “j” to move down to the next email (standard Gmail behavior, I think; and it’s intuitive if you’re used to Vim)
- Repeat steps 2 and 3.
I realized today how much I dislike hitting “#” with my left hand while browsing with my right.
-
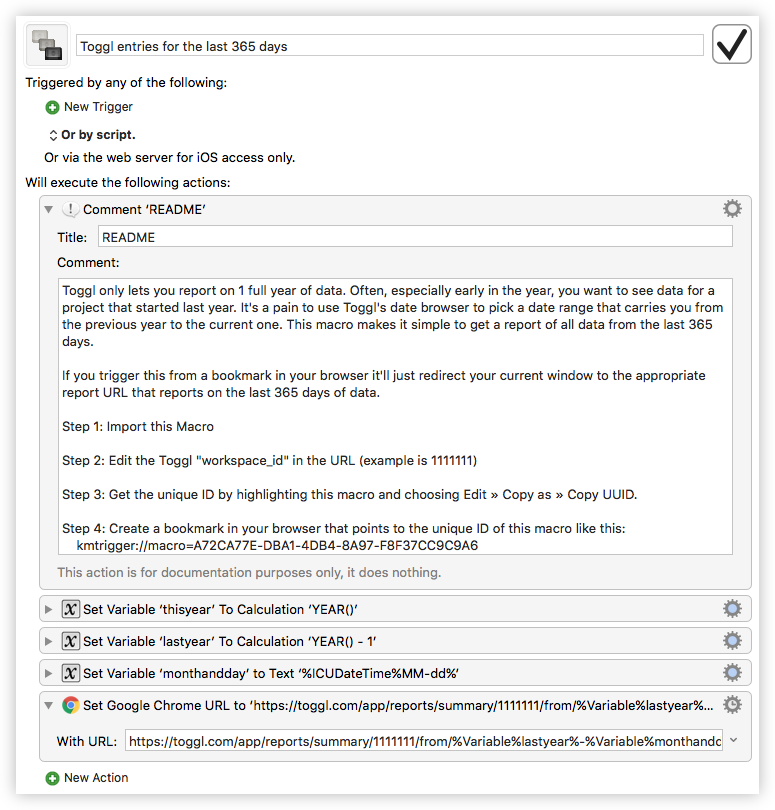
Bookmark with Dynamic Components via Keyboard Maestro (with Toggl Reports example)
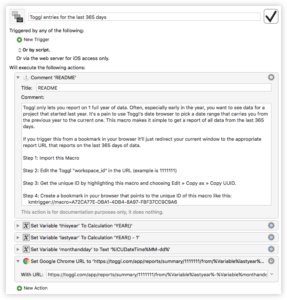
Here’s an example of how you can use Keyboard Maestro to create bookmarks that use dynamic components. For this example I wanted to create a bookmark that would give me the correct URL to get a report of the last 365 days of Toggl time entries. Toggl lets you pass a start date and an end date in the URL. Using KM it’s easy to replace those values with calculated date values.
Click the screenshot at the right to see the macro, which I’ve also provided here: Toggl entries for the last 365 days.kmmacros.
-
Microphone Enable/Disable with Alert – Keyboard Maestro Macro
In the past I’ve used Shush to achieve a push-to-talk or push-to-silence setup on my Mac. It works alright but more often than not I forget which mode I’m in, or whether I’m silenced or not. This leads to awkward moments in meetings.
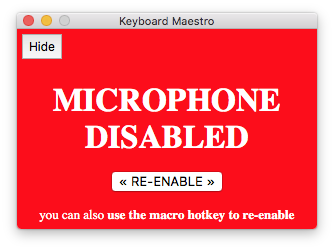
I’ve solved the problem using Keyboard Maestro. This macro, triggered via CTRL-m simple enables or disables the current “input” device (whatever is selected in the Sound preferences) by setting its level to 0 or 100. It’s a toggling macro so you can use the same hotkey to flip between the two states. Most importantly, though, is the nice popup alert that appears when you go into “disabled” mic mode. This window is hide-able if it gets in the way, and it also disappears if you re-enable (via hotkey OR the RE-ENABLE button). You can safely disable the “Custom HTML Prompt” action if you don’t want to see the prompt. Here’s what the popup looks like:
-
Random Mouse Distance in Keyboard Maestro
Here’s one way to choose a random item in a select list using just mouse movements and a random number. If you’re trying to do this in a browser there are cleaner ways to do it (javascript, chrome/safari actions, etc.), but for general usage across many applications this is a pretty universal solution.

I was surprised to find that you can type variables into the tiny coordinate text fields. They get bigger when you do.
When executed, this will select a random item (excluding “- None -“) from the select list.
-
Use Keyboard Maestro to Hide Instead of Close an Application
I use SnagIt to capture screenshots. The editor window that appears after you capture takes a few seconds to open if the application isn’t running. I realized that, while the capture tools remain open, the editor goes away when I hit ⌘W to close the window. Instead of using ⌘W to close the editor window, I sometimes remember to use ⌘H to hide the window, which hides the window but leaves the application open. The editor window pops open much quicker if the application is still open.
Using Keyboard Maestro I’m able to intercept the ⌘W that I do all the time (muscle memory), and turn that into a ⌘H.
-
Automatic Dropshadow and Border on Mac OS X Screenshots
If you’re like me, you take lots of screenshots. I probably average 20 a day. Primarily I use CMD-SHIFT-4 and drag a box around what I want to capture. The result is exactly what I highlighted. Here’s an example:
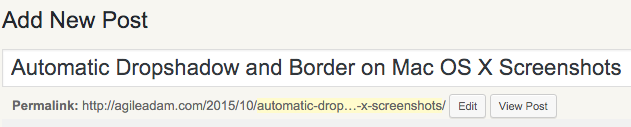
That looks fine, except there’s nothing that really helps the image stand out. It’s not ready for blog posts, documentation, or wherever else you’d like to use an image. I’ve approached the problem a few different ways in the past, but I’ve finally settled on a Keyboard Maestro-based solution for “Automatic” processing of these screenshots. I also have created a “Drop shadow” Service so you can apply a dropshadow to any image by right-clicking and using the Services menu.