-
Showing Salesforce RecordId in the Contact List
I have a table of contacts in Salesforce. To my surprise you cannot choose to show the RecordId (e.g., 0036g00002d4BOHAAU) in the field configuration. I did some digging and it seems it’s not possible without using some workaround that requires a calculated field or similar. I just needed the IDs for a one-time use. I realized the ID is included in the linked fields but didn’t want to have to hover each of the “Name” and “Account Name” links to see the IDs. So, I whipped up some javascript to simply append the RecordId to the end of these links. I can run the javascript via console, or even add it to a user script or place it automatically with a code injector extension.
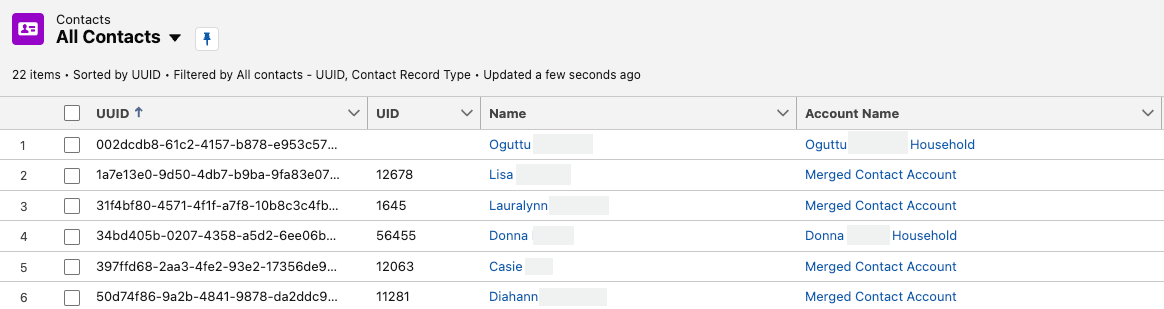
BEFORE 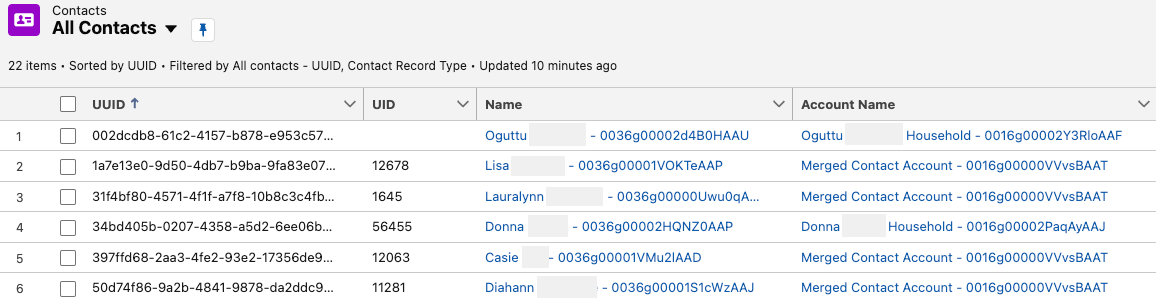
AFTER -
Using lnav to View Live DDEV Logs
https://lnav.org/ is a fantastic tool to work with log files. The SQL query functionality is a lot like https://github.com/multiprocessio/dsq, which also impresses.
My quick tip is that lnav can read from stdin. This means you can pipe content into it. Here’s how I monitor my ddev environment in realtime. Hooray for colors!
1ddev logs -f | lnav -qIf you haven’t explored lnav you’ll want to dive into the documentation a bit. It does a lot more than just give pretty colors to your log files / output. https://docs.lnav.org/en/v0.11.2/hotkeys.html is certainly worth bookmarking.
-
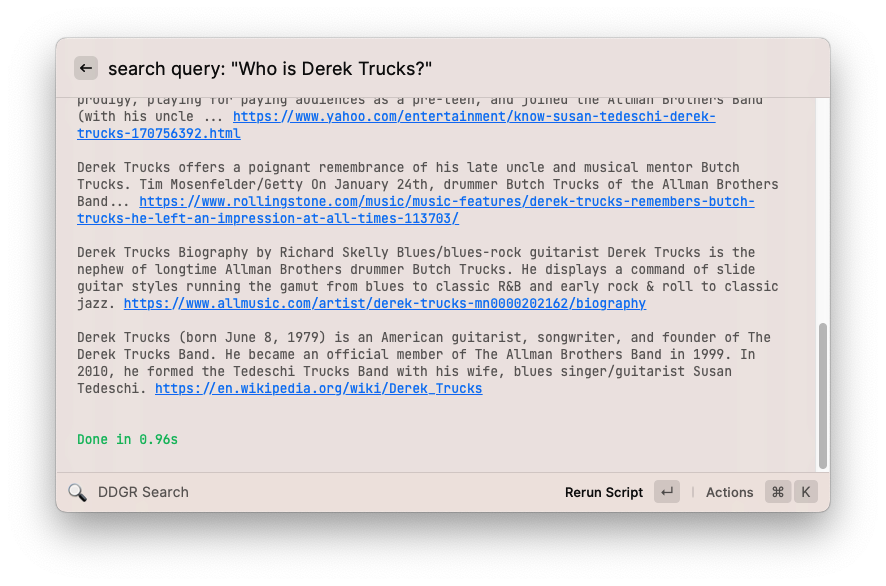
Quick Search Results using Raycast and DDGR
This is more or less a proof of concept. I wanted a fast way to look up facts without navigating away from what I’m working on.
Using Raycast is a natural place to start given you can pull it up and make it go away with ease. I looked for extensions in the Raycast Store (they’re free, despite the name) that might help but nothing seemed to do what I wanted. The Wikipedia extension does a great job of pulling information but it’s not as useful if I want a quick fact like “zip code for Portland Maine”.
Next I began looking for command line tools that return web search results. Googler came up as a top choice but the project has been archived. ddgr was the next one I came across; it works beautifully to return DuckDuckGo search results as JSON. I installed it with homebrew ( brew install ddgr ).
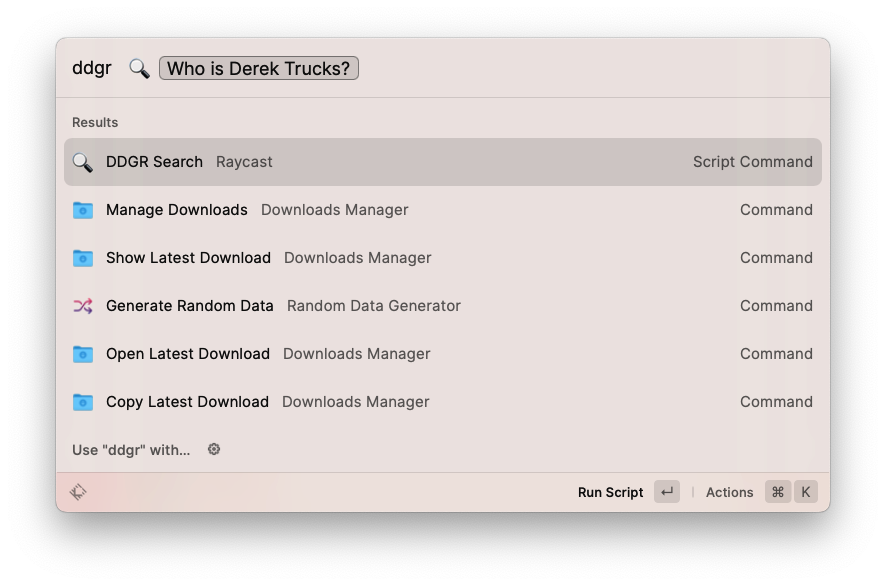
Finally, I whipped up a quick Raycast script command that would accept an argument, use ddgr to get the top search results, then spit them out in the Raycast output window. Raycast scrolls to the bottom of the output automatically, so I reversed the order of the top 10 results so that the most relevant appears at the bottom. That’s it!
There isn’t any graceful error handling, automated test coverage, etc. Use it at your own risk. 😉
12345678910111213141516171819202122232425262728#!/usr/bin/env python3# Required parameters:# @raycast.schemaVersion 1# @raycast.title DDGR Search# @raycast.mode fullOutput# Optional parameters:# @raycast.icon 🔍# @raycast.argument1 { "type": "text", "placeholder": "search query", "percentEncoded": false }# Documentation:# @raycast.description Search using the ddgr command line tool# @raycast.author Adam Courtemancheimport jsonimport subprocessimport sysquery = sys.argv[1]output = subprocess.check_output(["ddgr", "--json", query])data = json.loads(output)# Reverse the results so the most relevant are at the bottom# because Raycast will scroll you to the bottom of the outputdata.reverse()for result in data:print(f"{result['abstract']} {result['url']}")print("")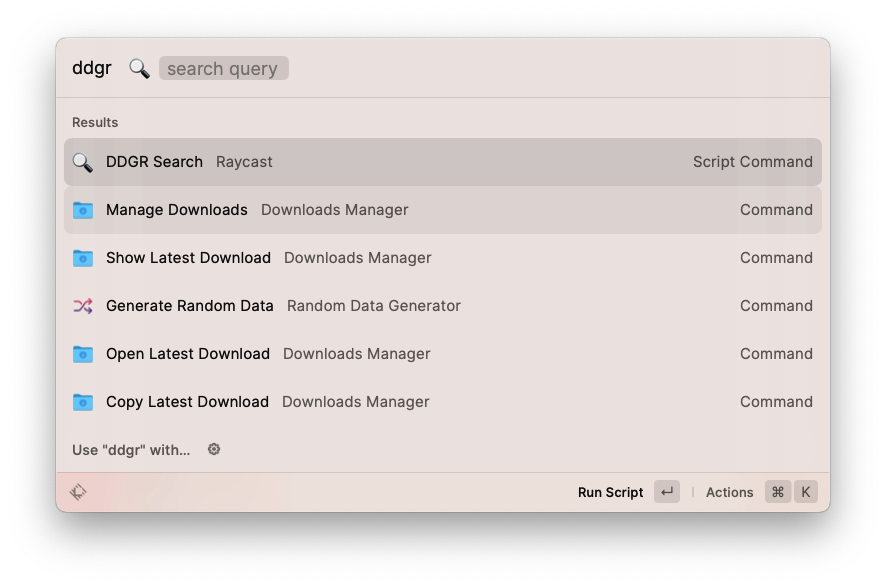
-
Handling Daylight Saving Time in Cron Jobs
- Our business is located in Maine (same timezone as New York; we set clocks back one hour in the Fall and ahead one hour in the Spring)
- Server A uses ET (automatically adjusts to UTC-4 in the summer, and UTC-5 in the winter)
- Server B uses UTC (not affected by Daylight Saving Time) – we cannot control the timezone of this server
We want to ensure both servers are always referencing, figuratively, the same clock on the wall in Maine.
Here’s what we can do to make sure the timing of cron jobs on Server B (UTC) match the changing times of Server A (ET).
12345# Every day at 11:55pm EST (due to conditional, commands only run during Standard Time (fall/winter)55 4 * * * [ `TZ=America/New_York date +\%Z` = EST ] && php artisan scrub-db >/dev/null 2>&1# Every day at 11:55pm EDT (due to conditional, commands only run during Daylight Saving Time (spring/summer)55 3 * * * [ `TZ=America/New_York date +\%Z` = EDT ] && php artisan scrub-db >/dev/null 2>&1Only one of the php artisan scrub-db commands will execute, depending on the time of year.
-
You may want to disable “Preferred Activities” on your Google Nest Wifi
Today I had the pleasure of experiencing fiber internet for the first time. The technicians were excellent and had it up and running in no time. Their hardwired tests showed great upload and download speeds. On my computer (hardwired also), however, my upload seemed to be stuck around 13Mbps. They assured me it was something about my configuration (cable, router, computer, etc.). I did some googling and mentioned it to co-workers. One co-worker mentioned something that lead me to the “Preferred Activities” settings for my Google Nest Wifi. Unchecking a single checkbox instantly (no reboot required) bumped my upload speed up from 13Mbps to 800Mbps.
Before (preferred activities enabled for Video Conferencing in Google Home app; I think this is default):

After (no Preferred Activities boxes checked)

Also, I want to give a shout out to GoNetSpeed. They were a well-oiled machine from the first phone call to the final setup. And they delivered on their promise a day early.
-
Wooshy + Keyboard Maestro = Incredible Power
UPDATE: I have a more reliable way of doing this with Applescript + KM. I will post someday when I have time.
I don’t have time to write a full post, but this is too good to not share quickly.
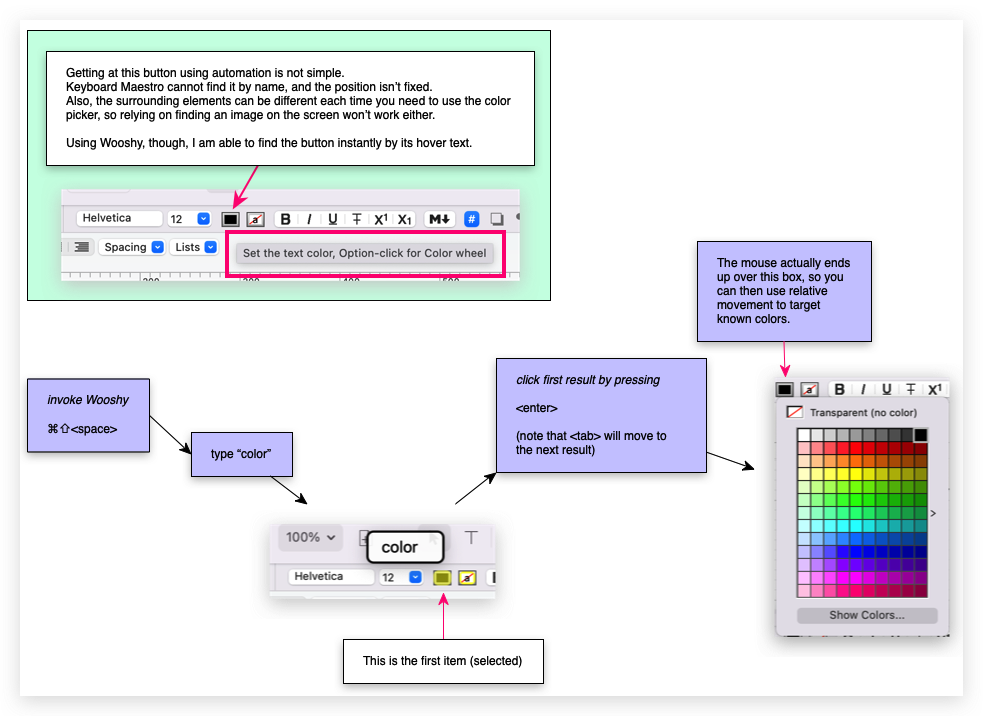
Wooshy lets you find+click elements on the screen by their hover text (in addition to many other features). This means you can target buttons that would be hard to target, like a color picker box (see below).
Keyboard Maestro lets you programmatically invoke/use Wooshy.
Using both, you can target virtually anything on the screen with a high degree of accuracy.
Here’s a visual example. Note that the steps in purple are easily be automated with Keyboard Maestro. Also it’s worth noting you can target all of the text on the hover text for even more accuracy (so I’d have KM search for “Set the text color, Option-click for Color wheel” in the example below. Each keystroke takes more time, so it may not be worth it.
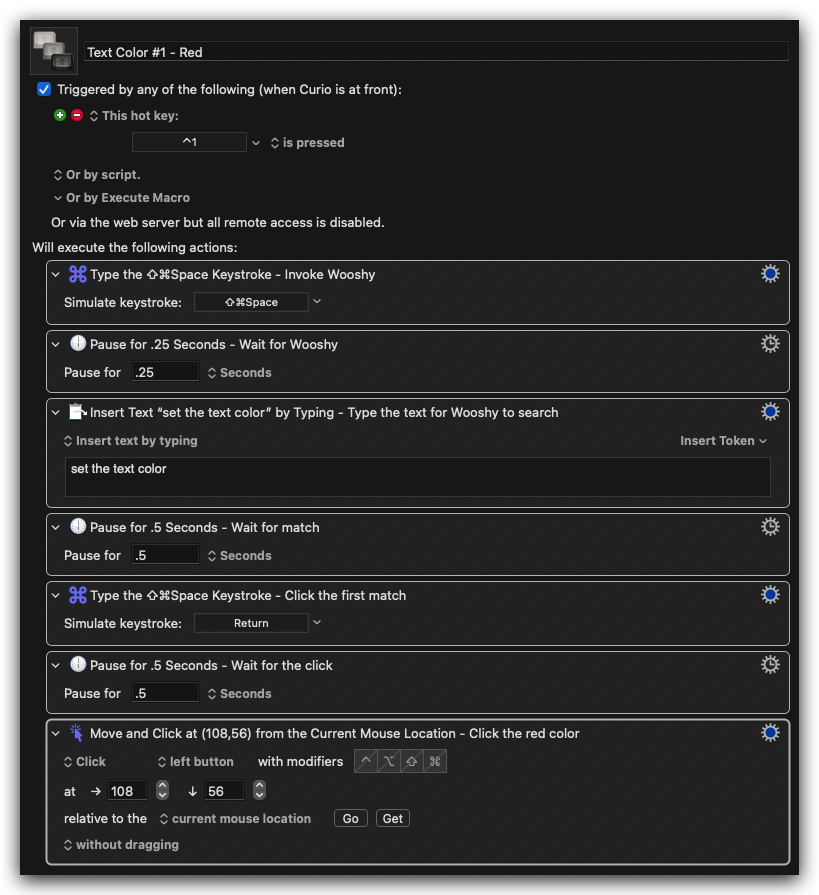
The following KM macro doesn’t have any safety checks (and I really hate using Pause), but it does illustrate the potential:
-
Using Dataview with Charts in Obsidian
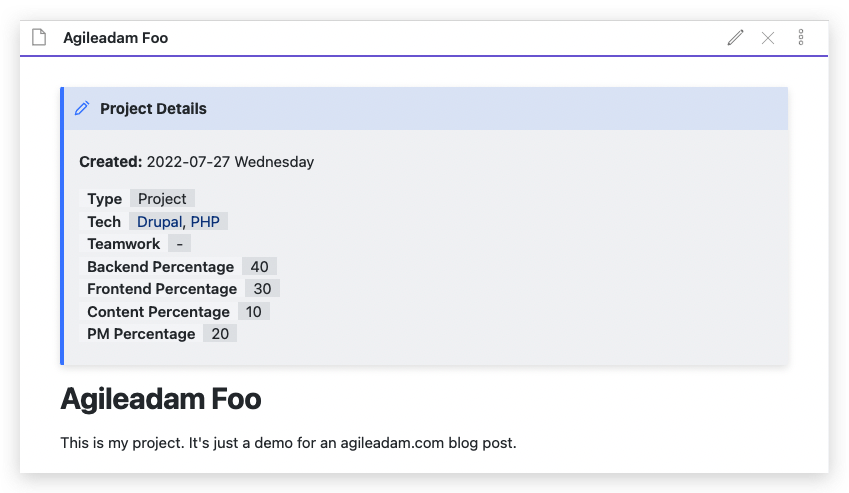
Obsidian is my third most used application after Keyboard Maestro and Alfred. I’ve been using the dataview plugin since I got started with Obsidian. It’s an incredible plugin that gives you the ability to treat your notes like database records. In this example I’ll show how I use dataview to make my projects queryable, and then how I use Obsidian-Charts to make some bar charts of this data.
Using Dataview Variables
Here’s an example of a Project file in my Obsidian vault:
-
Obsidian Daily Note Implementation v2
Here’s what my current Obsidian Daily Note looks like:
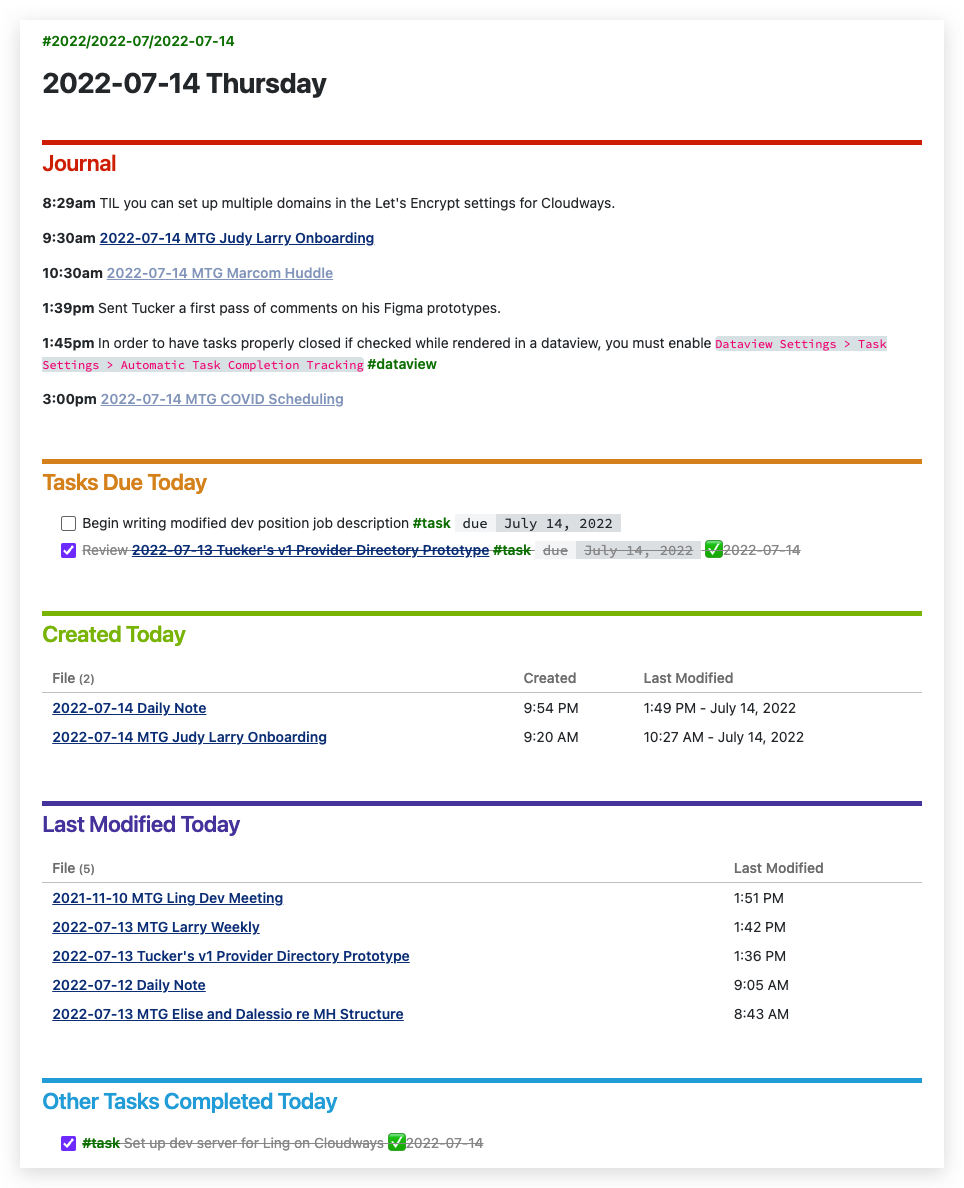
I’m pleased with this, having come from a pretty bland Daily Note setup prior to this. I’ll explain the setup:
Requirements
- Obsidian
- Daily Notes plugin
- Dataview plugin
- Tasks plugin
- Quick Add plugin (optional, I suppose)
As of July 15, 2022 this only works as expected if you edit in regular source mode, not live preview mode (the live preview won’t show the styling; see https://www.reddit.com/r/ObsidianMD/comments/vz2mw5/comment/ig9g0k9)
Template File
I set up the “Daily notes” plugin as follows:
-
Clipboard Manipulation using Keyboard Maestro
Keyboard Maestro has many triggers; these are responsible for executing macros. One such trigger is “The System Clipboard Changes“. I don’t use it often, despite how incredibly useful it is. It does exactly what it says: if a macro uses this trigger, Keyboard Maestro will execute the macro any time the clipboard content changes (when you “copy” something).
Here’s a quick example showing the usefulness.
There is a specific issue I have with Microsoft Outlook webmail within Google Chrome. Our email system leverages urldefense.com to alter all external links in the interface (see below). If I’m clicking a link, that’s fine, but if I want to copy a link’s URL it’s annoying to have to clean up the URL to remove the urldefense cruft.
12BEFORE: https://urldefense.com/v3/__https://someurl.com__;!!LQXXzXo!wt7t_lSnYAFTER: xxxxxxxxxxxxxxxxxxxxxxxxxxxx xxxxxxxxxxxxxxxxxxxxxxEverything I’ve marked with an “x” is added by urldefense.
The macro is simple. I leverage The System Clipboard Changes trigger to trigger the macro. The macro is inside of a macro group that is only activated for Google Chrome. I use an If Then Else action to determine if the URL is a target for manipulation. Finally, I use a Search and Replace action with some regular expressions to strip off the urldefense cruft.

-
Using Keyboard Maestro to Set a Window Size for Recording
This is a quick one, folks. This simple KM macro sets the front (active) window to a specific size. I use it to prepare a window for screen recording.
Image of Macro:
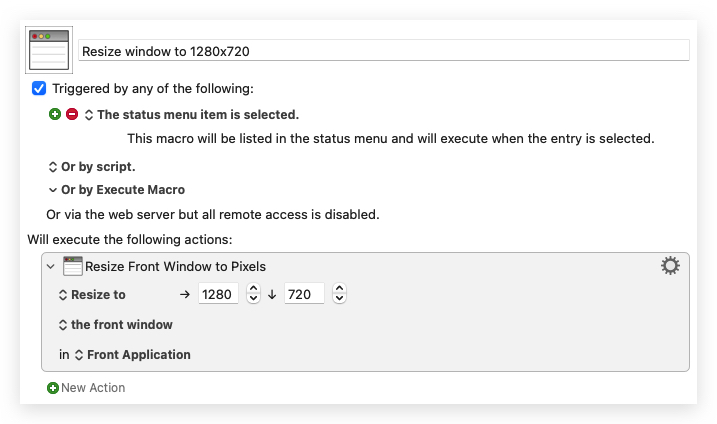
Text of Macro:
Resize window to 1280×720
Triggered by any of the following:
- The Status Menu is selected
Will execute the following actions:
- Resize Front Window to Pixels
- To: 1280 horizontally, 720 vertically.
- Notify on failure.